

Some better photos of the final guitar ...
I'm not a professional, nor even semi-professional luthier or a guitar builder. I do this for fun, for relaxation, and to develop the few guitar building skills that I've acquired, mainly from attending the build your own guitar (BYOG) courses run by Mark Bailey.


 Plenty of time today spent on the neck - the front of the neck today, getting it properly levelled, the fret slots cleaned out, the frets cut, pre-bent, and placed gently in position. With a hammer. After that, all those sharp edges have to be removed with a file. After the photo below, the side dots were put in place. Drilling a 2mm hole in the side of a fretboard which is only 5mm wide is not a task to be done with eyes closed ... there's not a lot of margin for error!


 A couple of hours later, and the marker dots have been glued in to the fretboard, the fretboard has been levelled (for the first of many times) and radiused. As you can see - 22 frets (and it's a 25" scale length). At this stage, the neck hasn't been shaped at all - it's still just a solid block.
 But it won't be a solid block for too much longer. Here it's been marked to show where the initial shaping will aim for.
 Last year, attacking my neck with a rasp was a fairly scary experience. This year it was less scary, but still seems to be inconsistent that a thing of such sensitivity (ie the back of the neck) is created from such brute force attack as ripping the wood to shreds with the rasp!
 The cap is now glued together (getting that glue joint took a while too!), and just placed on the body to check for size, orientation and broad fit ...
 And after dry clamping it full to check for any gaps between the body and the cap, the glue is applied (liberally) and the clamps re-applied - tightly.

 This photo shows the two pieces of the body, glued together and sash clamped to set overnight. Getting to this stage took - seriously - perhaps 2-3 hours. That time was spent in preparing the edges to be joined. The wood had been prepared on the planer, and you might assume that the planer left a good straight and flat edge, suitable for glueing.
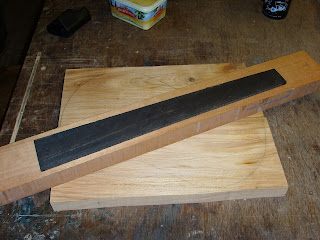
  Final job of the day was to glue the fretboard to the neck. Before this can be done, the truss rod has to be covered with a thin wood fillet glued into the top of the truss rod slot. This then has to be planed level and then sanded until it is right (see above). Once it's right, then the fretboard can be glued on, clamped and left to set overnight.

 Soundclips


